NEWS TAG
brand
What is ESD Flooring - ESD Antistatic Floor Work Principle, Installation, Grounding, Testing
Electrostatic discharge (ESD) flooring is a critical component in environments where electrical charges can pose a risk to electronic components, equipment, and safety. This guide will cover everything you need to know about ESD flooring, including its principles, applications, installation, grounding, maintenance, and testing.
What is ESD Flooring?
ESD flooring is designed to prevent the buildup of static electricity by safely conducting static charges to the ground. It typically consists of materials like vinyl, rubber, or carpet that contain conductive elements such as carbon fibers or carbon nanomaterials. These materials ensure a never-failing resistance range of 10^6 -10^8Ω, crucial for maintaining the integrity and functionality of sensitive electronic environments.

Who/Where Needs ESD Flooring?
ESD flooring is essential in various sectors where static electricity can interfere with electronic components and operations. This includes:
Manufacturing Facilities: Where machinery and conveyor systems are prevalent.
Data Centers and IT Rooms: Protects sensitive data processing equipment.
Investment and Financial Firms: Prevents static that can affect trading and operations.
Military and Aerospace: Necessary in areas dealing with explosives and sensitive electronics.
Medical Facilities: Ensures the safety and functionality of medical electronics.
How Does ESD Flooring Work?
ESD floors work by integrating conductive materials within the flooring compound which connect to a ground. As people and equipment move over the floor, any static electricity generated is immediately drawn down into the ground, preventing it from discharging onto sensitive devices or causing sparks that could ignite flammable substances.

How To Install ESD Flooring Over Existing Floors?
ESD flooring can be installed over existing floors such as vinyl composition tile (VCT) or painted surfaces. The key steps include:
Assessment of Current Flooring: Determine the type of existing floor (e.g., vinyl composition tile (VCT), painted, or epoxy-coated floor). The condition and type of the existing floor will affect the feasibility of the installation.
Bond Strength Testing: Check how well the existing flooring is bonded to the substrate. This can involve: Pull testing using a suction cup. Using a putty knife to probe seams and determine if tiles can be easily lifted.
Remove Surface Coatings: Strip off any sealers, waxes, or floor finishes to expose the bare surface of the existing floor. This ensures that the new adhesive and flooring bond directly to the floor rather than to a weak, potentially removable layer.
Surface Cleaning: Ensure the surface is clean and free of debris and dust after stripping.
Application: Where necessary, apply a cementitious skim coat to the cleaned floor. This step helps to: Create a flat surface. Fill in gaps and seams in the existing floor. Skim coating prevents the telegraphing of old seams and imperfections through the new floor, which can appear over time due to traffic and environmental conditions.
Laying the New Floor: Once the surface preparation is complete, the ESD flooring can be laid down. This usually involves: Using conductive adhesive to bond the ESD flooring to the existing surface. Ensuring all flooring elements are properly aligned and seams are tightly sealed.
Initial Testing: After installation, conduct initial resistance and grounding tests to ensure the floor performs as expected.
Addressing Issues: If any sections of the floor fail these tests, additional measures may need to be taken, such as reapplying adhesive or re-laying sections of the flooring.
Final Checks: Conduct a thorough inspection and final testing of the entire floor area to ensure complete functionality.
Regular Maintenance: Set up a maintenance schedule that includes regular cleaning and periodic testing to maintain the ESD properties of the flooring.
Considerations and Challenges
Asbestos in Old Flooring: If the old flooring contains asbestos (common in older VCT tiles), special precautions must be taken:
Testing for asbestos content before disturbing the tiles.
Possibly encapsulating the asbestos-containing material instead of removing it, depending on local regulations and the condition of the floor.
Cost vs. Safety: Deciding whether to remove or encapsulate existing flooring involves balancing cost, safety, and the potential for future flooring issues. Always consider long-term implications and compliance with safety standards.
Professional Advice: Given the complexities and potential legal implications (especially with asbestos), consulting with professionals like those at Accessfloorstore is advisable before proceeding.
How To Ground ESD Flooring?
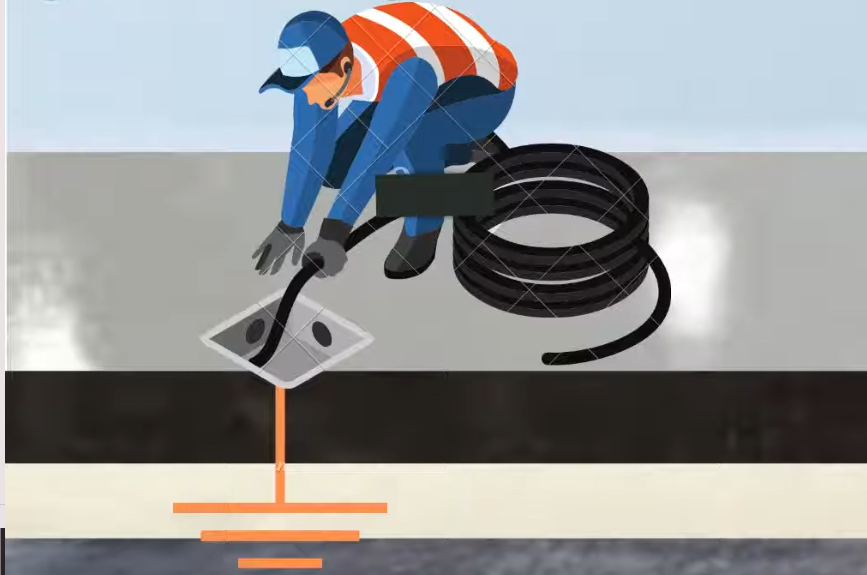
Grounding an ESD (Electrostatic Discharge) floor is a key step to ensure that any static electricity generated by walking or equipment movement is safely dissipated into the earth, preventing damage to sensitive electronic components. Here’s a detailed guide on how to ground ESD flooring using various methods:
Grounding Method 1: Grounding to an AC Electrical Outlet
This is the most common and straightforward method to ground an ESD floor:
Materials Needed:
Screwdriver
24-inch copper grounding strap
ESD flooring
Conductive adhesive
Steps:
Step 1: Remove the center screw on the cover of the AC electrical outlet using a screwdriver.
Step 2: Locate and remove the grounding screw inside the AC electrical outlet.
Step 3: Punch a small hole in the 24-inch copper grounding strap, provided with ESD flooring. The hole should be smaller than the head of the screw removed in step 2.
Step 4: Secure the copper straps to the AC electrical outlet with the same screw removed in step 2.
Step 5: Allow the 24-inch copper strap to run down the wall to the subfloor, concrete, etc. Fold the copper at a 90-degree angle at the point where the wall meets the floor. Lay the remainder of the copper strap flat on the subfloor.
Step 6: Cover the copper strap on the floor with conductive adhesive and new flooring material. For a cleaner installation, the copper should be covered by the wall base.
Step 7: Finish the installation by reattaching the AC outlet cover with the screw removed in step 1.
Note: Always use a ground plug tester to ensure the outlet is correctly wired before connecting the grounding strap.
Alternative Grounding Methods
For environments where an AC outlet is not conveniently located or additional grounding methods are preferred, alternative strategies can be employed:
Grounding ESD Flooring to a Natural Earth Ground:
Step 1: Drive a 4 to 6-foot copper grounding rod into the ground until only 2 or 3 inches are exposed.
Step 2: Attach the copper grounding strap to the exposed end of the rod using a grounding clamp.
Step 3: Run a wire (No. 10 or No. 12) from the grounding rod to the grounding strap and secure it with a wire nut.
Grounding ESD Flooring to Building Steel:
Step 1: Affix the grounding strap to the ESD tile as described in the AC outlet method.
Step 2: Drill a hole in the exposed steel support column.
Step 3: Use a grounding screw or clamp to attach the end of the copper strap directly to the column or mount a grounding clamp to the column and use it to clamp the copper strap.
Step 4: Conduct a continuity test with a volt-ohm meter (VOM) to confirm a compliant electrical ground connection between the copper strap and the electrical ground.
Note: When attaching copper straps to structural elements like I-beams, ensure that any paint or coatings are removed to make a clean metal-to-metal connection.
How To Test ESD Flooring?
Regular testing of ESD flooring ensures it meets required resistance levels and continues to perform effectively. Testing methods include:
Using NFPA-approved Probes: These large probes ensure adequate contact with the floor to measure resistance accurately.
Point-to-Point and Ground Resistance Tests: These tests confirm the uniform conductivity of the floor and ensure there are no safety hazards.

ESD flooring is a specialized solution vital for protecting sensitive environments from the risks of static electricity. By understanding the principles, installation, maintenance, and testing of ESD flooring, facilities can ensure their operations run smoothly and safely. For more detailed information or technical support on ESD flooring, contacting experts like those at Accessfloorstore.com can provide additional resources and guidance.
